Hardware & Tooling
PCB Etching Production Line User Manual
For Mechanical part (Etching production line)
Process/Operation:
- Don't connect the circulation pump and heating element, unless there is enough etching liquid (or just water) in the etching tank.
- Make sure Big Red Button (E-Stop) is pressed DOWN, before plugging in the power supply.
- Connect USB-A plug to PC.
- Enter 192.168.3.1 in browser URL bar, to access the notebook.
- Login credentials: "xilinx" & "xilinx".
- Navigate to "RUN_ETCHER_WITH_THIS" > "ETCHING_CONTROL.ipynb".
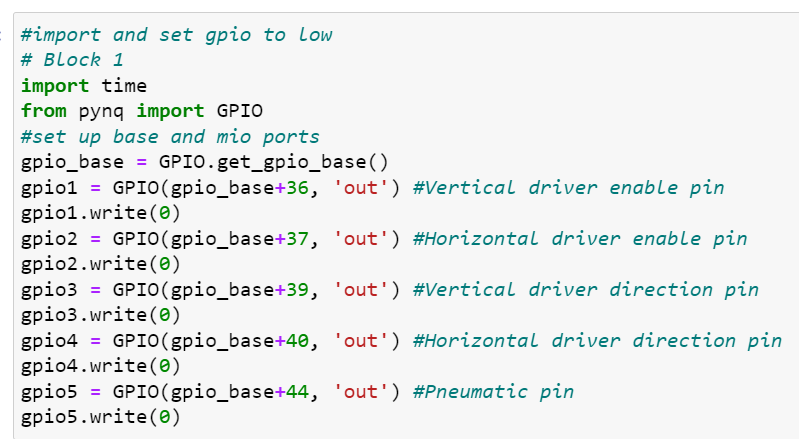
- Run Block 1 of the Jupyter notebook, for setting ALL GPIO to low.
- Then release the Big Red Button (E-Stop).
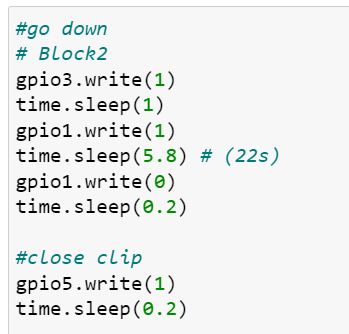
- Run Block 2, to grab and transport PCB for etching, then clamp moving up and go into standby.
- Wait til etching process finishes.
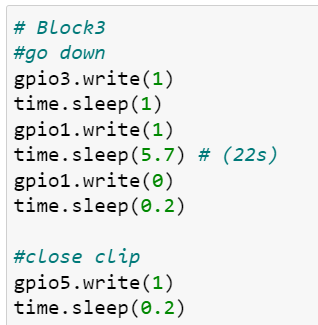
- After etching is done, run Block 3 to grab etched PCB from tank and go to rinse, then go back to starting point, then back to original position for standby.
- It is a good idea to leave the Big Red Button (E-Stop) down after use and unplugged, just in case.
- You can use the "Run All" command to sequentially run through all code blocks, demonstrating a full production cycle.
Debugging:
- Need to move motor somewhere?
- Create a new block at the end of code.
- Copy code (Forward, Backward, Up, Down) from the code blocks.
- time.sleep(x), change x to 1, for small steps, run multiple times until it bumps against the linear rail end and skips steps (but don’t worry it’s fine, for a limited amount of time)
For AI recognition part (AI QC)
- Plug in USB power for LCD screen, it should turn on blue or camera feed.
- If signal acting up, unplug the Mini-DP plug and re-plug it.
- Click the run all button located next to the restart button on the top
For Pneumatic pump Operation:
- Connect the pipes.
- Plug in the power for compressor.
- Press the ON button to let compressor do its work, until target pressure is met.
- For the pressure regulator-thing, pull out the middle plastic cap and turn towards “+” sign direction, the number on gauge should climb up, set it to 0.2MPa, press the plastic cap back in to lock position.
- After use, pull plastic cap and turn it towards “-”, till it drops to 0, lock cap.