Hardware & Tooling
Vitis-AI
This repo contains info on how to set-up and use Vitis-AI.
Installing the Tools
Use the following steps for installation:
- Install Docker, if Docker is not installed on your machine.
- Follow the Post-installation steps for Linux to ensure that your Linux user is in the group Docker.
- Clone the Vitis AI repository to obtain the examples, reference code, and scripts.
git clone --recurse-submodules https://github.com/Xilinx/Vitis-AI
cd Vitis-AI
Install Docker
Incase Docker isn't installed
Before you install Docker Engine for the first time on a new host machine, you need to set up the Docker repository. Afterward, you can install and update Docker from the repository.
Set up Docker's apt repository.
sudo apt-get update
sudo apt-get install ca-certificates curl gnupg
sudo install -m 0755 -d /etc/apt/keyrings
curl -fsSL https://download.docker.com/linux/ubuntu/gpg | sudo gpg --dearmor -o /etc/apt/keyrings/docker.gpg
sudo chmod a+r /etc/apt/keyrings/docker.gpg
Add the repository to Apt sources:
echo \
  "deb [arch=$(dpkg --print-architecture) signed-by=/etc/apt/keyrings/docker.gpg] https://download.docker.com/linux/ubuntu \
  $(. /etc/os-release && echo "$VERSION_CODENAME") stable" | \
  sudo tee /etc/apt/sources.list.d/docker.list > /dev/null
sudo apt-get update
Install the Docker packages.
sudo apt-get install docker-ce docker-ce-cli containerd.io docker-buildx-plugin docker-compose-plugin
Verify that the Docker Engine installation is successful by running the hello-world image.
sudo docker run hello-world
Docker has been installed but additional steps are required to run Docker without root priviledges
Create Docker group
sudo groupadd docker
Add your user to docker group
sudo usermod -aG docker $USER
run the following command to activate the changes to groups
newgrp docker
Verify that you can run docker commands without sudo
docker run hello-world
Done with Docker set-up!
Run Docker Container
Refer to https://github.com/Xilinx/Vitis-AI for the dedicated docker version number.
Run the CPU image from Docker Hub:
docker pull xilinx/vitis-ai-cpu:latest
./docker_run.sh xilinx/vitis-ai-cpu:latest
Once it has loaded follow the instructions to activate the conda environment required.
In this case we will be using tensorflow2
conda activate vitis-ai-tensorflow2
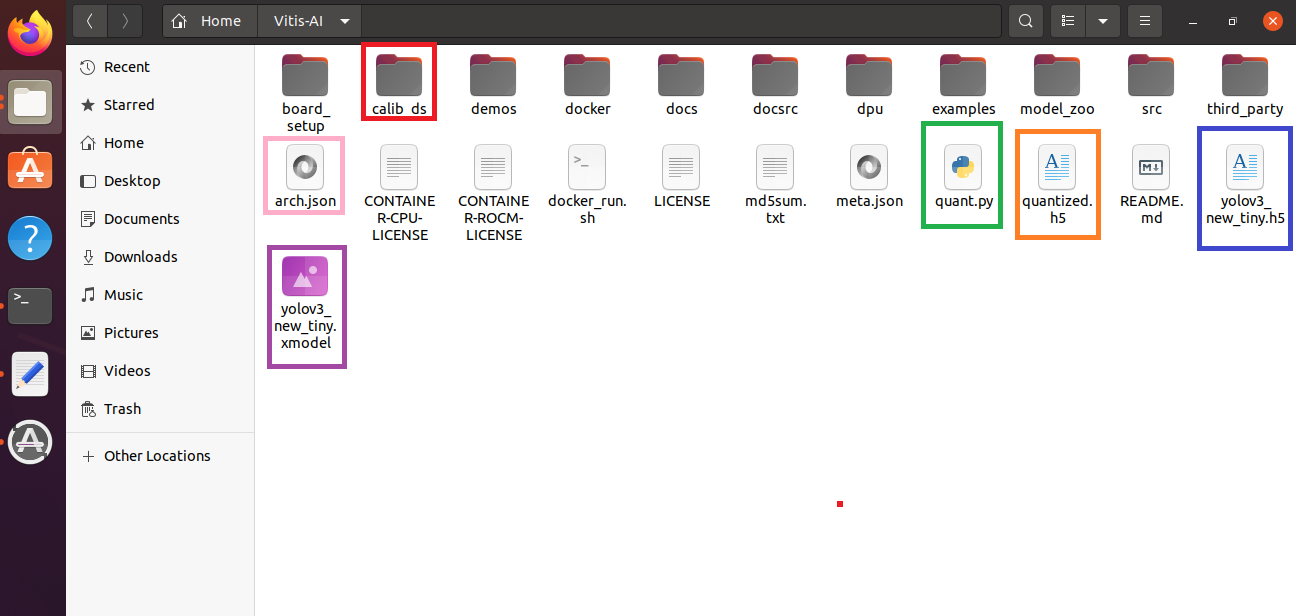
Then make sure you are in the correct directory and add the AI model, calibration_dataset and quantization script.
Here is what it should look like
Quantizing your tensorflow model
The quantization script looks something like this but can change based on the requirements.
import tensorflow as tf

# compile  vai_c_tensorflow2 - m "yolov3.h5" -a "arch.json" -n "yolov3_new_tiny" --options '{"input_shape": "1,224,224,3"}'

model = tf.keras.models.load_model("yolov3_new_tiny.h5")

batch_size = 1
calib_data = tf.keras.utils.image_dataset_from_directory(
        'calib_ds',
        seed=123,
        image_size=(416,416),
        batch_size=batch_size)

from tensorflow_model_optimization.quantization.keras import vitis_quantize

quantizer = vitis_quantize.VitisQuantizer(model)
quantized_model = quantizer.quantize_model(calib_dataset=calib_data,
        				    calib_batch_size=1,
        				    verbose=0,
        			 	    add_shape_info=False
        				    )

print("Done1")

quantized_model.save('quantized.h5')

print('Done2')
There are a few things to note
For tensorflow2, to quantize the model you first need to load the model and the calibration dataset and make sure to pre process it based ion your model requirements before sending it to the quantizer. Make sure to set the batch size to 1 as larger batch sizes may affect the quantization accuracy.
To evaluate it against the test set you can do that how you would normally do it with tensorflow2.
Compiling the model for the DPU
To compile the model you can use the compiler provided by Vitis AI.
Just make sure to prepapre the correct arch.json file for the FPGA you are using.
Ultra96v2 uses B1600 so its arch json is
{ "target":"DPUCZDX8G_ISA1_B1600" }
Then compile it using the following script
vai_c_tensorflow2 - m "yolov3.h5" -a "arch.json" -n "yolov3_new_tiny"
There are some options which will not be covered.